
A refrigerator roll is nothing more than a yeast dough that you allow to proof slowly overnight in the fridge. The benefits being that not only do you get to put off the long process of proofing and benching and proofing and baking all in one spell, but also the flavor is enhanced by a longer proof time. Yeast is hardy stuff (as long as you don't take it above 140 degrees, where it will die). The more times a dough gets to proof, the more flavor a dough has because the yeast has more time to grow and eat and make bubbles. Which means after all the work, you'll actually want to eat the stuff.
And, if you have a Kitchen Aid mixer (or something of it's ilk), you really don't have to put much muscle into the process as well....although, there are many a day when one's frustrations have been taken out on a lump of yeast dough and the world was a better place for it....but I digress.
Let me also say, this recipe makes a substantial amount of dough (I got 2 dozen rolls out of it) so you may want to take half of the dough and freeze it for later. Just cut the blob in half after the first rising and wrap it in a bit of plastic wrap and seal it in a ziploc bag. When you are ready to use it again, remove from the freezer, place in the fridge over night and continue the process.
Here's the recipe:
1 1/2 cup milk
1/2 cup sugar
1 1/2 tsp salt
1/4 cup butter or shortening
2 pkgs of instant yeast (fast acting seems ironic here but if you've got it, use it)
1/4 cup warm water (80 degrees or so)
5-6 cups of AP flour
 |
| Milk scalding |
 |
| happy living yeast |
In the mixer bowl, blend together the sugar, salt and yeast. To this, add the milk mixture. Then the warm water. The milk will wake the yeast and the sugar will feed it. Wait 10 minutes and make sure your yeast is alive-you should see bubbles and happiness in the bowl. If, instead, it still looks like dirty water, you, my friend, have dead yeast so don't continue. Go pour yourself a drink.
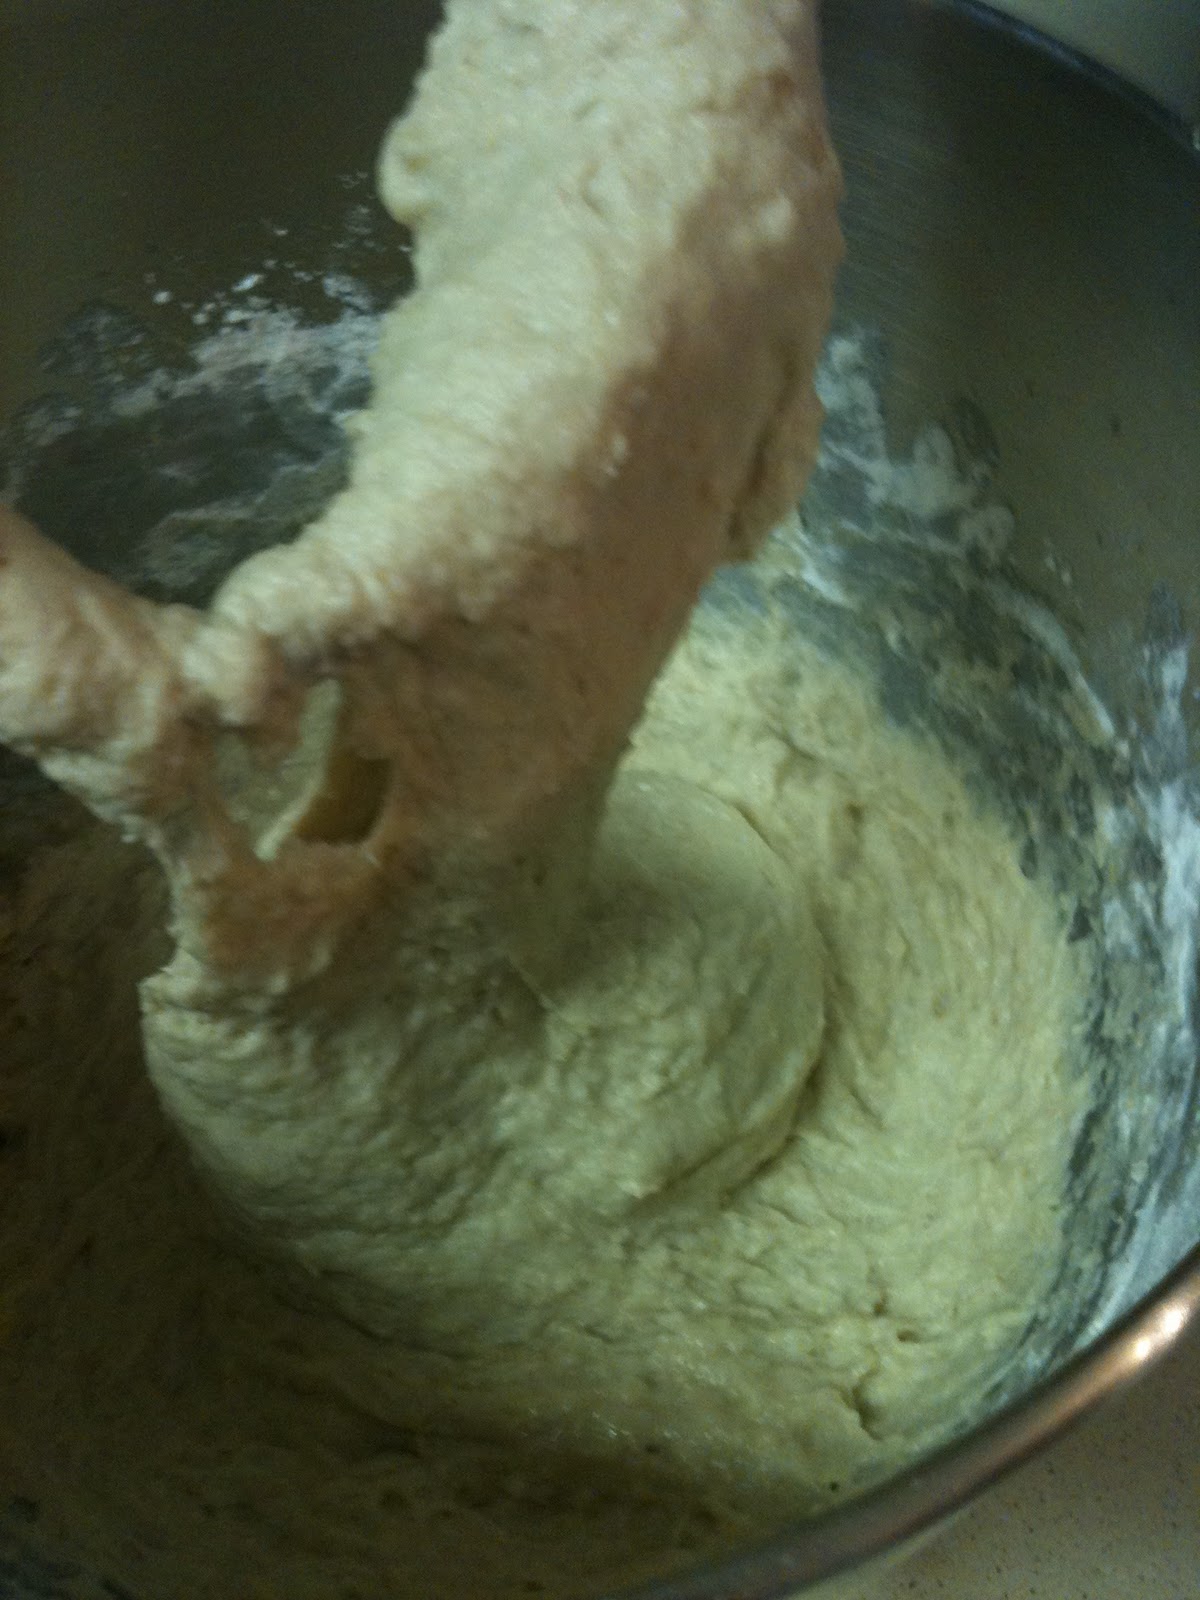 |
| Dough that needs more flour See how the dough pools to the bottom of the bowl? |
 |
| Dough that has enough flour. See how it pulls away from the bowl? |
Continue kneading the dough (yes, you can do this by hand if you so desire). The finished dough should be soft and smooth because you've worked the gluten bonds of the flour into bliss. The dough should pull away from the sides of the bowl, removing any bits of dough in the process. (This is also known as "benching" because a baker would knead the dough on a work bench).
 |
| Dough ready for first proof. |
 |
| Happy dough from first proof |
When the timer calls you back, press down the dough to remove the air (sounds counter productive but it's not-you are building flavor and texture). This process is also known as "punching" down the dough but I don't think there's any need for violence, do you? (that's a
Now, if you want to go to call it a day with friend yeast, return the dough to the bowl and cover with plastic wrap. Place in the fridge over night (or, actually, for a few days if you really are procrastinating). This is a simple but hardy dough. It will keep in the fridge for 3-4 days....but I'd check on it now and then so it maybe doesn't take over the bowl. ("IT"S ALIVE!!!!")
 |
| ready to go night-night |
 |
| Dough in the morning. See how it doesn't even have it's make up on? |
By the way, putting unbaked dough in a cooler like this is also known as "retarding." Don't get all worked up, please. It's simply called this because the cold air is "retarding" the yeast's process of eating and growing.
(*if you don't want to chill the dough over night, proceed to the next step)
 |
| Rolls before panning. |
For rolls, cut the dough into even balls; I usually cut the dough, then divide again, then divide again until I have the amount I want. Like I said, I got 24 rolls from a full batch. Now, smooth out the smaller portions by simply rolling them on your counter top. Remember, they won't magically smooth out when they proof and bake. If the dough looks rough when you put it in the pan, it will look rough when you proof and bake it (....of course, there are also ways around that).
 |
| I decided to cut a cross-hatch in the top with a pair of scissors and add poppyseeds to my rolls. |
IF you have ugly looking rolls when you place them in the pan, you could brush the dough with a bit of melted butter and sprinkle them with poppy seeds or sesame seeds or caraway. Actually, you could do this even if your dough isn't ugly. Do it before they start to proof-otherwise, you run the risk of knocking all that wonderful air out of the rolls and you'll have to let them proof longer.
About 15 minutes before they are ready to go, preheat your oven to 375. When the oven is ready, pop in the pans and bake for 10-15 minutes. The rolls should be golden on top and on bottom (if you are using glass pans, you'll see that.) If you choose to use aluminum baking pans, the rolls will cook faster so keep an eye on them.
As soon as you remove them from the oven, brush with melted butter (this added butter will keep them soft and they will last longer without going stale).
You'll note there are no pictures of the finished rolls....um, yeah....
Not much smells better than a house where bread is baking...
No comments:
Post a Comment