Powered By Blogger
Showing posts with label sauces and condiments. Show all posts

Wednesday, October 12, 2011

Happy Birthday To The Maid: Butter Cake with Caramel Frosting


A vintage cake cover for a vintage cake


Butter and milk
Eggs and sugar
 Thing 1 informed me the other night that she knew what I liked to do with my time: cook and clean. Couple that with a birthday, all the extra baby weight I'm carrying and the natural restlessness I tend to feel at this time of year and you've got the makings of a breakdown.

...but I don't have time for a real breakdown because there's laundry to do and meals to cook and somebody colored all over the kitchen table without paper.

 Ok, maybe I can see why my eldest child just assumed that I was living my dream. Wow. Seriously, I must be, like, no fun at all....cue reservations for Breakdown City...for later, much later.

On the other hand, to be utterly and perfectly honest, I DO enjoy making my own birthday cake. It's an indulgence in my mind. Partly because it's something that is solely based on my preferences and partly because I never ever ever ever use a box mix (pahhtooey) for my cake.  Cake snob? Bet your ass.


The ingredients for this cake are simple and classic. The cake itself would be just a nice with any form of buttercream frosting but is sturdier than a box mix so it can also be filled with heavier fillings such as jams, caramel, fudge or ice cream.

Preheat your oven to 325. Grease two 9 inch round cake pans (or one 9x4 round pan--that's how I have 3 layers instead of the customary 2).

For ingredients, you will need:

1 1/2 sticks (3/4 cup) butter
1 cup milk
Melt these two together in a saucepan over medium heat and set aside. You just need the butter to be melted so don't bring the milk to a simmer or anything. Set it aside to cool.

In a bowl, blend together--

2 cups AP flour
2 3/4 tsp baking powder
1/2 tsp salt

And, finally, in your mixing bowl, measure out
2 cups sugar
4 eggs

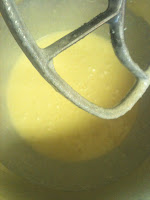
The eggs and sugar need to be beaten on high until their color changes to a pale yellow and the mixture is thick and light. You will notice the sugar dissolves somewhat and the blend will climb higher up the side of the bowl.


Scrape down the bowl to remove any sugar clumps that may have formed at the bottom of the mixing bowl before folding in the dry ingredients. Don't try to get all the flour absorbed at this point. You just want it somewhat incorporated because you still have some mixing to do and you don't want to make the cake tough.

Now fold in the milk/butter blend and to this add
1 tsp vanilla extract
Fold everything together until just incorporated and there are no pockets of flour. Be sure to get down to the bottom of the bowl.


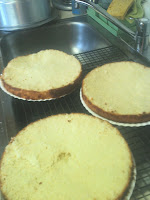
Pour the batter into your pan(s) and place in the center of the oven. For two pans, bake for 20-30 minutes. For a single pan, bake for 30-45 minutes. The cake will get golden and begin to pull slightly from the sides of the pan when it is done. Check the center before removing from the oven.  I will also say this is one of the few cakes I've made that was perfectly level on top, no peaking or sinking--beautiful!


When the cake is finished, allow it to cool in the pan for 10 minutes before turning it out on a cooking rack. The cake must be completely cooled before you can ice it.

So let's talk frosting. The caramel frosting here is an old-fashioned cooked frosting that takes about 15 minutes to make. You need a solid, high-sided saucepan and a wooden spoon. The wooden spoon is actually non-negotiable for authenticity so don't get all oxo good grip on me, k?


I used a double batch of frosting because I had more layers. I'll give you the single form of the recipe but it can be doubled.

1 pound (about 2 2/3 cups) light brown sugar
1/2 cup (1 stick) butter
7 tablespoons evaporated milk (NOT condensed milk)
You'll need a tablespoon of vanilla at the end.

***At this point, have your cake ready to frost, because once you start the frosting, you have to

complete the cake.


Put everything in a the saucepan and turn to a medium heat. Stir together as it melts and bring to a boil. Turn down the heat so the mixture bubbles gently and set a timer for 7 minutes. Keep stirring to make sure nothing is burning but don't pull a muscle at it anything. Remove from the heat after 7 minutes and let cool for another 5 minutes.

After the cool down period, use that wooden spoon to beat the frosting for 2-3 minutes until it thickens.

Time to frost the cake!  Be sure to spread things quickly. Let the frosting roll over the sides of the layers as you go and then smooth them out at the end once the top is covered. Work quickly. Also, if you are going to garnish with pecans or walnuts, sprinkle on before the frosting sets or they will just fall off.

IF the icing gets too hard to fast, you can soften it over low heat. Stir in a little milk to soften it. If you have a "blemish" in the finished product, try dipping your spatula in hot water before smoothing out the area.

I know everyone likes to quote Forest Gump and say that life is like a box of chocolates, but I tend to think it's more like a scratch cake--you get the quality you put in to it and the results can be delicious or disappointing, but that depends on your expectations. 

Monday, September 05, 2011

Alla Checca: Using Up Those Gorgeous Tomatoes

So....last summer I was really really industrious and I was all about preparing for the following year so I proposed saving your seeds. And then this spring, I really got a jump on things by planting those seeds so I could have a patio full of beautiful tomato plants. Ready to see the bounty of my hard work?

it's almost overwhelming, huh?

When you have finished laughing, we'll get on with the rest of the post, ok?  Actually, I kind of feel like that scene at the end of 28 Days with the guy who can't keep the plant alive or take proper care of the dog and is getting desperate....

*this was the best clip I could find *


My brain sounds something like this: I have 3 kids and a dog and run a household on many levels and can't seem to grow a decent tomato to save my life.  *cue crying like above*


Enter wonderful parents with mad skills for growing things and keeping children and dogs alive.  So then I had a box full of gorgeous home-grown tomatoes that looked like this:
hells yeah, Mom and Dad
To say that these beauties are utterly delicious is a major understatement. However, to say that we could use them up just making salsa and sandwiches before they turned was rather unlikely as well and I was NOT about to waste a single one.

Hence search engine to compensate for mommy brain....uncooked sauce? Sure!


This recipe is (1) soooo easy (2) time flexible and (3) really pretty--try it for company or a stay-in date for instance.

Basically, if you can cut things and boil pasta, you can make this.  Which pretty much covers how much brain power I have to devote to making dinner at this stage in the game anyways.


Stage 1:

Dice 5 tomatoes, removing the seeds
Chop 1/2 cup of fresh basil (one plant I did manage to grow properly this summer)
Stir together in a non-metal bowl along with 
1/2 cup olive oil
1 tsp salt
1 tbs minced garlic


pretty
yes, it sits on your counter
all day--no one will die,
I promise


Stir this all together and cover with plastic wrap. This is now going to sit, on your counter at room temperature for at least 2 hours and up to 10 hours. See? easy. 


Stage 2: 

Boil one pound of pasta-shape and size of your choice. Drain off water and pour the tomatoes over the hot pasta and toss--along with some parmesan cheese. Adjust salt and pepper to taste.
pasta and sauce
pasta


pasta, sauce and cheese


Stage 3: 

Eat.  Possibly with a bit of crusty garlic bread. This will serve four generous portions by the way so if you are feeding more people, just  double as needed. 


See what I'm saying here? Easy. Simple. Good. 


And no mothers were stressed in the making of this dinner.

Friday, July 29, 2011

Buttermilk Brownies: Grab a Fork

Buttermilk is a workhorse I often employ in this house-it's cheaper than sour cream or yogurt and more versatile in baking, with just as many savory applications as sweet...and fantastic for soaking your chicken or fish in before frying if you aren't making biscuits, scones, muffins, pancakes or soda bread. And now I can add brownies to the list.

These are not your traditional brownies, dark dense and chewy. Actually, they remind me of a Texas sheet cake-complete with the frosting you apply while the pan is still hot, creating a crusty glaze. The base is moist, with a fine crumb. And  while they cut clean and easy, you might be tempted to use a plate and fork to eat them....or a spoon and a scoop of ice cream. You get a lot of brownie for the work-you'll need a 15x10 pan instead of the traditional 9x11 pyrex or casserole dish.

So, grab your big pan and give it a spray then preheat your oven to 400 (see, not even your usual baking temperature).

In your mixer bowl, combine these ingredients:

2 cups of sugar
2 cups AP flour
1/2 tsp salt
1 tsp baking soda


Measure out
1 cup of buttermilk
2 eggs
1 Tbs vanilla

Now for the fun part; in a saucepan, melt together
1/2 cup (1 stick) butter
1 cup water
1/4 cup cocoa
1/2 cup oil

Stir while you bring this all to a boil. Remove from the heat and pour over the flour/sugar mixture in your mixer bowl. Blend them together and scrape down the bowl with a spatula before adding in the buttermilk and then the eggs and vanilla.
the batter is thin and
shiny


Pour this lovely, shiny batter into the prepared pan and set your timer for 15 minutes. There is a good chance you will need to bake them longer-closer to 20 minutes but in the last few minutes, you'll be mixing up the frosting that gets added to the brownies hot.


So, wash out your mixing bowl and blend together the following:

1/2 cup (1 stick) butter
1/4 cup cocoa
1/3 cup buttermilk
1 tsp vanilla
1# or 4 cups of powdered sugar
1 cup chopped pecans

Beat them together-it will lighten in color a little as it comes together.


As soon as your brownies are done (test it like a cake-use a toothpick for no wet batter or press lightly on the center to see if it springs back), pull them out and spread the frosting over the pan. Weird, huh?  But oh so yummy.


 As the pan cools, the frosting forms that delicious crustiness. These aren't overly rich or chocolately-just the right amount for an after school snack or to dress up with ice cream with some sauce for after dinner dessert.  And since the pan is large, it's great for potlucks, company or the now-possible Sunday football game crew.
 I should have side view of the finished product but I've been busy eating them or laughing at Mr. Devlin's guilty look as he goes back for seconds.

Wednesday, July 27, 2011

Chorizo Black Bean Pockets: Easy Betty Says It's Too Hot To Work

Last week, my little crew escaped to the Old Country (aka Pennsylvania) for a week to be spoiled rotten by the grandparents. Considering that the Dev's and I haven't been alone together for over two years and I hadn't had a moment to really get ready for Baby Boy, a week without Thing 1 and Thing 2 was a gift, plain and simple. Your mother in law may drive you crazy, showing up at your house all the time, taking the kids blah blah blah. You bless that woman right now. You don't know what a gift you have having family near you.

Needless to say, after we (kind of) adjusted to the quiet in the house (and the fact that we could eat candy for dinner and watch movies really loudly at night with no fear of waking the sleeping dragons), we transitioned beds and cribs and moved around bedrooms and painted stuff and scrubbed carpets and washed baby clothes. And after a baseless meltdown about the state of my body, the hospital bag is also packed and ready to go. So while I have no idea who is going to watch the girls while I'm actually at the hospital birthing their brother, everything else is ready for this child to actually enter the world (knock on wood).

I don't need to tell you it's blistering hot outside--yes, it's summer and it should be hot; but this is like "I'm sorry, I repent" hot out. And as I'm nearing the final stages of this pregnancy--this long and difficult pregnancy--I've reached that point where I don't leave the house unless absolutely necessary. If not because the cashier at my local grocery store can't keep her annoying comments about my appearance to herself, then because the heat index is in triple digits by 9 am.

And since I'm avoiding said grocery store, I need to get a little more creative with dinner around here. This is what I came up with tonight:

You'll need:
2  8-oz cans crescent rolls (shut up, they were on sale and I had a coupon)
1 pound chorizo sausage (I used mild for the sake of the children)
1 large or 2 small tomatoes, diced
1 cup cooked or 1 can rinsed and drained black beans
8 oz shredded cheddar

Preheat your oven to 375 and prepare a baking sheet. While your oven heats, use a skillet to cook the chorizo (remove the casing) with the black beans, adding in the tomatoes once everything else is cooked through. Cut the heat and taste your filling to see if it needs something more. If you like spicy, add in some hot peppers or some chili powder.  Mexican sausage is pretty flavorful though so you may not even need salt and pepper.


On the sheet pan, separate out the first can of crescent rolls so you have 8 triangles.


Now top them with a heaping tablespoon of the filling and top with the shredded cheese. Leave the edges clear.


Using the second can of rolls, top the triangles and seal the edges with a fork. You may need to stretch out the top piece a little to cover the filling but since it's not a super-wet filling, you shouldn't have to worry about them exploding open.

 Now you have 8 triangles....and also about half the filling left-freeze it for later or use up 4 cans instead of 2 and feed the neighbor kids that just got out of your pool.

Pop the pockets into the oven for 12-15 minutes and bake until golden brown. I served these with a little salsa and sour cream for dinner. Fruit salad on the side and you have a full meal. Easy peasy. Dinner in less than half and hour.

The filling on these could be anything really. Leftover chicken with some spinach and feta? Mozzarella, pepperoni and mushrooms with a marinara dipping sauce? A little ground beef with diced carrots and peas? Look around in the your fridge or pantry and use up that stuff that's just sitting around.  If you add cheese to it, I guarantee you can slip in some veggies without the kids caring.

Thursday, July 14, 2011

Basic Homemade Pizza Dough

There's a saying--if everybody has the best way to do something, nobody does. I find this is especially true with any form of yeast dough, pizza dough included. It's why I will rarely ever tell you that my way is the best. What I can tell you is that everything I post, I've tried so I can at least tell you if it's edible and/doable.

This dough is very easy and not at all fussy and I like how it is portioned. A single batch makes either 2 medium pizzas or 4 individual pizzas or calzones. Right now, we're a 4 person family....er, well, four of us have teeth and can pick up a pizza to eat, how 'bout that?

But because it's so easy to mix up, I made a batch for dinner and then turned around and made a double batch (which fit in my Kitchen Aid mixer just fine) to put up in the freezer for later.

Here's what you need:

1/2 cup of warm water (nothing below 80 degrees and nothing above 120)
2 1/4 tsp (1 pkg) instant yeast

Put these two together and let them slow dance for 10 minutes while you get everything else ready. Remember, if you see no bubbles or change in your mixture in the next 5-10 minutes, your yeast is dead and you need to throw it out and start over with different yeast.

Now you need to add

4 cups (approx) of flour
1 1/2 tsp salt
1 1/4 cups warm water
2 tbs olive oil

I usually add my dry ingredients, turn on the mixer to slow and add the wet stuff to keep the flour from trying to fly out of the bowl.

Use your dough hook attachment on your mixer to bring it all together. If it seems sticky, add more flour. If it seems too dry, add a bit more water. yeast is a living thing and will change your recipe on any given day depending on heat, humidity, type of flour, color of your shirt, etc

If you wish to burn a few extra calories, you can pull your dough out and hand-knead it for about 5 minutes on your counter until it's smooth and stretchy.

Spray a bowl with pan spray and toss in your dough ball--pour a little oil or spray a little more pan spray on the top of the dough, cover it it with a damp towel and set the dough someplace warm (yeah, like you have a cool spot right now) for about an hour to double. If you are experiencing a really warm, humid day, it may not take a whole hour to rise.

Once doubled, "punch" down the dough (get the bubbles and air out) and either freeze it in a ziploc bag for later or prepare it for cooking.

Preheat your oven to 400 and prepare what ever baking surface you are using (cooking sheet, sheet pan, baking stone) with a dusting of cornmeal to keep the crust from sticking.

I found I could hand-toss this dough pretty easily, if you're in to that sort of thing. Regardless, make sure you always (1) "dock" your dough (pierce it with a fork evenly)--this keeps it from bubbling up (2) spread a little olive oil over the surface before adding your sauce and toppings.


This dough is a good one for calzones too so if you are in the mood, divide the dough, flatten it out, fill (don't over-fill) with your meat, cheeses and veggies, fold over to form a pocket and seal the edges. Don't forget to cut a few slits in the top for steam vents and bake away (you may need to drop your oven temp to 375 for these babies).

Friday, July 08, 2011

Easy-Peasy Chocolate Buttercream

I hope you weren't waiting for this, like with the cake all baked and hoping I'd get on with it and post the recipe. Because I don't think I can handle any more pressure right now--especially on my body! Oh dear! This child is weighing on me something fierce.....

But I did say I had an easy chocolate buttercream recipe for you and a promise is a promise. This recipe is actually one I got from Martha Stewart (not, like, directly or anything--people like her don't know people like me....for example, I don't have to be plugged into a wall at the end of the day).

This recipe makes about 3 1/2 cups of frosting (nearly enough for a regular round layer cake but not exactly enough, in my opinion, for decorating with a piping bag). The good news is, it doubles and triples easily and whatever you don't need now, you can freeze for later.


Also, you don't need to do any sifting. I would, however, let my butter soften to almost room temperature before starting. If you forget to pull your butter ahead of time, warm it slowly in the microwave 10 seconds at a time until it yields to being pressed gently. You want the butter to be able to hold it's shape because you want to dice it up into cubes.


In your mixer bowl, combine:

3 1/2 cups of confectioners sugar
1 cup of cocoa powder


Just mix until they are a little more evenly distributed before adding in 1 1/2 sticks (that's a cup and a half) of butter, diced. Don't turn the mixer up on speed or anything. In fact, I wrap a dishtowel around the top of the bowl to keep anything from flying out and getting everywhere.

You won't really be able to tell that anything is happening just yet and you'll wonder if you did it right. You did.
 Add 2 tsp of vanilla (or almond if you're feeling daring) to
1/2 cup of milk

and add this to your mixing bowl.


Within a few moments, the frosting will moisten and change color. First, it will be a dark, lumpy mess but within a minute or two, the lumps will disappear and the color will lighten. So will the consistency of the buttercream. The longer you beat it, the lighter and looser it will becomes so don't be over-zealous, Love.


Use a large rubber spatula to scrape the bottom of the bowl to be sure you mixed everything properly. This frosting spreads easily and nicely. If you find your kitchen is a bit hot to work in, give the bowl a chill for 5 minutes or so and stir again before using. The butter will harden fast so don't forget about it for long.


Ok, so finally, I got you the recipe. Hopefully I won't be so long with another post but that's kind of up to my stamina so bear with me....7-9 weeks to go.....

Monday, June 20, 2011

Who's The Dip? How to Make Hummus

As the heat rises, my laziness extends in all directions. That's not to mean I don't have weird moments of nesting, like the other night when-instead of tucking my eldest into bed-I cleaned her room top to bottom (even dusting!). But I'm not so very interested in cooking every meal right now. We've been doing a lot of this actually. Which led me to whip up a large batch of hummus to dip and spread on everything (even in the middle of night apparently).


According to Wikipedia--

Hummus is high in iron and vitamin C and also has significant amounts of folate and vitamin B6.[16] The chickpeas make it a good source of protein anddietary fiber; the tahini consists mostly of sesame seeds, which are an excellent source of the amino acid methionine, complementing the proteins in the chickpeas. Depending on the recipe, hummus carries varying amounts of monounsaturated fat.[17] Hummus is useful in vegetarian and vegan diets; like other combinations of grains and pulses, it serves as a complete protein when eaten with bread.


I--per usual--used dried chick peas for my hummus, soaking them overnight and boiling them until they were soft before continuing. You can, however, use a couple of cans of chick peas if you so desire, making sure to drain and rinse them.

This recipe makes a fair amount of spread so it's great for parties too. I've been spreading it on wraps and crackers for Thing 1 and Thing 2. Thing 2 in particular is pretty fond of the stuff, licking it off chips and crackers, then handing them back to me for "re-fills."


Ok, so back to the hummus. If you are using dried, figure half a bag. If you are using canned, 2 15 oz cans should do the job. Here's what else you'll need...


Stir up your tahini
before using it. It will
be thick, like
peanut butter.
2 lemons or 1/2 cup of lemon juice
2-5 cloves of garlic, based on your preference. I used diced garlic and I like a lot so I had about 2 heaping teaspoons
2 tsp olive oil
1/2 tsp salt (and pepper if you like)
1/2 (approximate) cup of water (this is more a give or take based on how thick your hummus is)
1/2 cup tahini (look in your Ethnic food aisle at the grocery store--it's ground roasted sesame seed ground up like peanut butter and it's WONDERFUL).


why, yes-those are finger marks
from me "testing" the hummus


Pull out the food processor and dump in the peas, tahini, garlic, lemon juice, half the oil, salt and pepper and blend it all up smooth. Remove the top of the processor and stir so you know you are getting the top and bottom blended well. Check the flavor to see if you want more of anything and add in some water before blending again.


You're done. Yep, that's what the lady said.


I pretty much can't get enough of this stuff.


When serving hummus, feel free to drizzle a bit of nice olive oil over the top-this serves two purposes really-flavor and keeping the top from drying out. You can also sprinkle a bit of fresh chopped herbs for a pretty display for parties.


Refrigerate any leftovers. In the meantime, dip or spread your hummus everywhere--pita chips, multigrain crackers, cucumber slices, carrot sticks, salad wraps--go on with your bad self.