Powered By Blogger
Showing posts with label dessert. Show all posts

Friday, November 25, 2011

Happy Birthday to the Damned Dog

**What I'm about to say may actually piss a few of you off, so let's be clear about something please: I don't care.


I was raised in the country with farm animals and gardens and dirt and dogs. Glorious dogs, smart dogs, mutts from other farms, born from other smart dogs that would protect and defend the homestead and the children, dogs that sat next to you while you fished and ran next to you as you played. Dogs you cried over when they died.

I love dogs.

 I actually feel a certain affiliation with dogs for their loyalty and fierce devotion. And much like a mother for her pups, come near my kids and I'll do more than just growl at you, trust me.

Dogs should be protected from abuse; they should never be used for fighting or illegal sport; they should never be left in your hot car, your cold back yard, your abandoned house to fend for itself. A dog should never be kicked (that's what husbands are for....I'M KIDDING),  dropped off in the country (where some of our dogs came from when I was a child), or let loose to continually breed.

Every kid should come home from
school to find a puppy....
That said, my dog is not my child. A dog is not a human being and not a person and their rights are limited....they don't get a vote on what's for dinner and they don't sleep in our bed. I'm not going to build my future around the dog, the way I do around my kids. I don't buy them gifts at Christmas; I don't refer to them as members of the family--I'm not the dog's "Mom"....that's some other bitch. The bottom line: I don't treat the dog better than my kids; I know some people that do that and it infuriates me to a blinding rage.

Our dog came from a craiglist add that turned out to be posted by a puppy mill. We didn't know that when we saw her picture but after seeing what conditions she was living in ("in spite of" is more like it), we not only took her home, we reported the farm. No creature should be forced to live that way.

The dog came home with us. The dog had never worn a collar, never been on a leash, never been inside a car or a house, never had a dish of food for itself, never had toys, never been bathed, groomed or loved. It took a couple of days just to convince her to step out of her open crate and explore our little home. Poor puppy.

And then the dog got comfortable. The pro's: she guards the house and children, she helps the Dev's relax, and she hoovers the floor around the dinner table like a hair-covered shop vac. The con's? hair hair hair everywhere, half-gnawed rawhides on the stairs in the middle of the night, cold noses shoved under the covers in the middle of the night, hair hair hair, the inability to tell the difference between  someone knocking on the door and someone one in a movie knocking on a door....and, my personal space issue-she likes to lick my toes and it makes me a little crazy. In fact, as an introvert, I find the dog a little smothering in general--the worst being the week before I delivered the wee lad when she herded me from room to room all. day. and. all. night. And did I mention the hair????


"unbreakable squeaker" huh? 
Said dog, Silhouette or Sil, also just so happens to share the same birthday as Thing 2 so it became an issue as to wether or not we would "celebrate" with the dog. Why an issue? because while I'm all about finding fun things for the kids to experience, never in my life have I ever had a dog birthday party (let alone really know the exact day any of our dogs were born on, to be honest). I felt some kind of moral confusion to be honest...there are children out in our world that should be so lucky to be celebrated, why am I baking for a dog???


But in the end, the excitement of small children is a powerful motivator (could imagine if they organized and lobbied Congress?).  Thing 2 got yellow cake with flowers; the dog got cupcakes.


A couple of things about this recipe....first of all, no special ingredients--you will probably have all of these items in your house already. Secondly, you'll never have to worry if the kids try to eat them because you know what's in them and none of it is 'bad stuff.' Third, you can freeze these, just like muffins and pull them out as desired. This batch yields approximately 2 dozen standard size muffins.  Mini muffins are perfect for smaller dogs.

Preheat your oven to 325 and pull out two bowl.

In the larger bowl, blend together the following:

3 cups flour (I use a blend of whole wheat and ap)
1 tbs baking soda
3 cups of shredded carrots....the smaller the shred, the better

In a separate bowl, whisk together

3/4 cup of vegetable oil
1 cup of honey
3 eggs

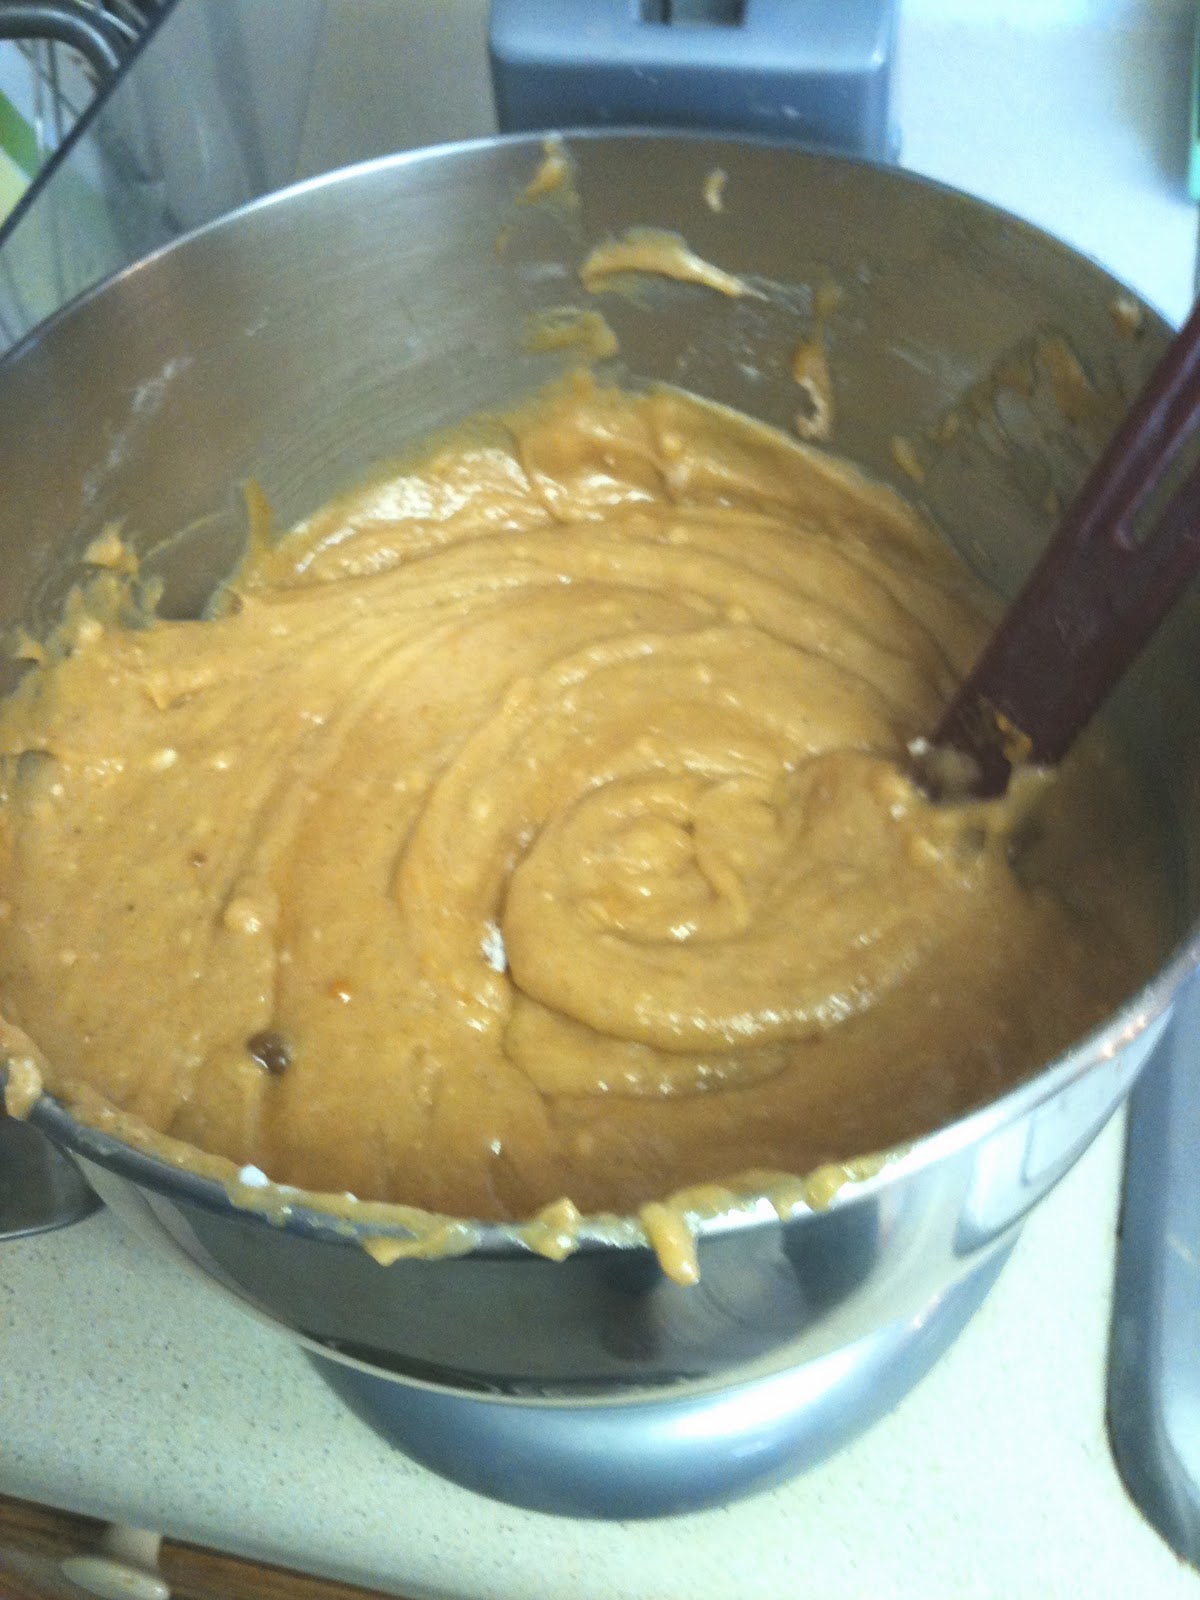
Now add this to the dry ingredients and add

3/4 cup of peanut butter (don't use the "all-natural" type whenever you are baking unless it specifically says to by the way)

Blend all of this together and scoop into the muffins cups so they are about 3/4 full (they don't rise much).  The larger muffins take about 18 minutes, the smaller ones around 112-15. Allow to cool before serving to the pooch or freezing.


...and if it happens to be the silly beast's birthday, by all means, pipe a bit of peanut butter on top to let them know you are really glad they bark at people in the middle of the night, even if it's just at you holding a sleeping child....

Tuesday, October 18, 2011

The Pumpkin Bread Recipe I Can Never Find


When the frost is on the pumpkin and the fodder's in the shock and the duh duh duhduh duh duh something something turkey cock....yeah, I know I had to recite that poem 5th grade but every year I forget a little more of it....which isn't the only thing I find I forget every year. 
I have this nice little pumpkin bread recipe that I really like and every year, I dig through about 20 books and a box full of slips of papers and then I remember what book it's actually in.
 This year, I'm going to be the smart one and just post it on my blog so I know where to find it. You'd be surprised how often I actually do that-post something here so 
I don't lose the darn thing. Often, very very often. 

So, Saturday, I'm stalking my way through facebook and I swear every friend I have was making pumpkin bread and it reminded me of college when somebody would pop some microwave popcorn in the dorms and the next thing you knew, everyone was popping some because the power of suggestion was too great (that was back when the college I went to had one microwave in the dorm, down in the laundry area so if you didn't hurry, you'd by waiting with your little bag for 30 minutes in line behind every one else...I'm so old).

Anywho...

This recipe makes a nice couple of 9x5 loaves so you can store one in the freezer if you'd like. We've been eating it for breakfast over here and it's been nice and moist for quite a few days now. 

Here's what you need:

Preheat the oven to 350 and prepare your pans. I think this also breaks down to 7 mini loaf pans if that's your thing. 

In a medium bowl. blend together the following dry ingredients:
3 1/2 cups AP flour
2 tsp baking soda
1 tsp baking powder
1 tsp salt

Now for the spices....true confessions, I don't measure my spices because I love fall spice and the idea of measuring 1/4 tsp of fresh ground nutmeg has always seemed ridiculous to me. Basically, you want a blend of  cinnamon, nutmeg, clove, ginger and black pepper. However it is that you want to get down with your spices is your thing. I like a lot of cinnamon and about a 1/2 tsp of the rest. Mix all of this together with a fork and set aside.
In your mixing bowl, blend
2 1/2 cups sugar
1 cup brown sugar
1 cup oil (vegetable, canola, corn, whatever)

Once this is fully blended, add in
3 eggs
1 tsp vanilla

Now open that 15 oz can of pumpkin puree...make sure it's NOT pumpkin pie filling by the way.
Blend this in and then scrape down the bowl before adding in the dry ingredients. Just mix until nearly combined before pouring in 

1 cup of buttermilk (sour milk, yogurt, sour cream)


Blend smooth and scrape down the bowl to be sure it is well blended. Now, if you're a nutty kind of person, you could also fold in 1 cup of toasted chopped pecans and it will be lovely but I actually like this recipe without. It makes a really beautiful but firm bread that slices nicely.Divide the batter between the pans and tap them on the counter to remove any bubbles. I sprinkled the tops lightly with cinnamon sugar as well to create a bit of a crusty crunch on top. 

Bake for 35-50 minutes, depending on your oven. Check with a toothpick or thin-bladed knife to be sure it is fully done on the inside before removing to a cooling rack. Let it cool in the pans for 10 minutes before turning out to cool completely. Wrap in a bit of waxed paper or parchment and seal in a ziploc bag for storage once the bread is completely cooled. 
There, now I won't loose this silly thing again....

Wednesday, October 12, 2011

Happy Birthday To The Maid: Butter Cake with Caramel Frosting


A vintage cake cover for a vintage cake


Butter and milk
Eggs and sugar
 Thing 1 informed me the other night that she knew what I liked to do with my time: cook and clean. Couple that with a birthday, all the extra baby weight I'm carrying and the natural restlessness I tend to feel at this time of year and you've got the makings of a breakdown.

...but I don't have time for a real breakdown because there's laundry to do and meals to cook and somebody colored all over the kitchen table without paper.

 Ok, maybe I can see why my eldest child just assumed that I was living my dream. Wow. Seriously, I must be, like, no fun at all....cue reservations for Breakdown City...for later, much later.

On the other hand, to be utterly and perfectly honest, I DO enjoy making my own birthday cake. It's an indulgence in my mind. Partly because it's something that is solely based on my preferences and partly because I never ever ever ever use a box mix (pahhtooey) for my cake.  Cake snob? Bet your ass.


The ingredients for this cake are simple and classic. The cake itself would be just a nice with any form of buttercream frosting but is sturdier than a box mix so it can also be filled with heavier fillings such as jams, caramel, fudge or ice cream.

Preheat your oven to 325. Grease two 9 inch round cake pans (or one 9x4 round pan--that's how I have 3 layers instead of the customary 2).

For ingredients, you will need:

1 1/2 sticks (3/4 cup) butter
1 cup milk
Melt these two together in a saucepan over medium heat and set aside. You just need the butter to be melted so don't bring the milk to a simmer or anything. Set it aside to cool.

In a bowl, blend together--

2 cups AP flour
2 3/4 tsp baking powder
1/2 tsp salt

And, finally, in your mixing bowl, measure out
2 cups sugar
4 eggs

The eggs and sugar need to be beaten on high until their color changes to a pale yellow and the mixture is thick and light. You will notice the sugar dissolves somewhat and the blend will climb higher up the side of the bowl.


Scrape down the bowl to remove any sugar clumps that may have formed at the bottom of the mixing bowl before folding in the dry ingredients. Don't try to get all the flour absorbed at this point. You just want it somewhat incorporated because you still have some mixing to do and you don't want to make the cake tough.

Now fold in the milk/butter blend and to this add
1 tsp vanilla extract
Fold everything together until just incorporated and there are no pockets of flour. Be sure to get down to the bottom of the bowl.


Pour the batter into your pan(s) and place in the center of the oven. For two pans, bake for 20-30 minutes. For a single pan, bake for 30-45 minutes. The cake will get golden and begin to pull slightly from the sides of the pan when it is done. Check the center before removing from the oven.  I will also say this is one of the few cakes I've made that was perfectly level on top, no peaking or sinking--beautiful!


When the cake is finished, allow it to cool in the pan for 10 minutes before turning it out on a cooking rack. The cake must be completely cooled before you can ice it.

So let's talk frosting. The caramel frosting here is an old-fashioned cooked frosting that takes about 15 minutes to make. You need a solid, high-sided saucepan and a wooden spoon. The wooden spoon is actually non-negotiable for authenticity so don't get all oxo good grip on me, k?


I used a double batch of frosting because I had more layers. I'll give you the single form of the recipe but it can be doubled.

1 pound (about 2 2/3 cups) light brown sugar
1/2 cup (1 stick) butter
7 tablespoons evaporated milk (NOT condensed milk)
You'll need a tablespoon of vanilla at the end.

***At this point, have your cake ready to frost, because once you start the frosting, you have to

complete the cake.


Put everything in a the saucepan and turn to a medium heat. Stir together as it melts and bring to a boil. Turn down the heat so the mixture bubbles gently and set a timer for 7 minutes. Keep stirring to make sure nothing is burning but don't pull a muscle at it anything. Remove from the heat after 7 minutes and let cool for another 5 minutes.

After the cool down period, use that wooden spoon to beat the frosting for 2-3 minutes until it thickens.

Time to frost the cake!  Be sure to spread things quickly. Let the frosting roll over the sides of the layers as you go and then smooth them out at the end once the top is covered. Work quickly. Also, if you are going to garnish with pecans or walnuts, sprinkle on before the frosting sets or they will just fall off.

IF the icing gets too hard to fast, you can soften it over low heat. Stir in a little milk to soften it. If you have a "blemish" in the finished product, try dipping your spatula in hot water before smoothing out the area.

I know everyone likes to quote Forest Gump and say that life is like a box of chocolates, but I tend to think it's more like a scratch cake--you get the quality you put in to it and the results can be delicious or disappointing, but that depends on your expectations. 

Thursday, October 06, 2011

A New Series For A New Chapter in Life: The Back of the Box

If you are still reading my blog, bless you for being so faithful while I have been busy elsewhere. My newborn is not so new now. Thing 1 and Thing 2 take turns loving on and then totally ignoring him as they whoosh through their own childhood experiences. And, naturally at this point, we have no real schedule or pattern for sleeping and eating and pooping and sleeping and eating and ....well, you get the idea.

That being said, my time in the kitchen is often more like the challenge round in Double Dare (see-now you know how old I really am). I have to get in, complete the task and feed the family in an unspecified amount of time before our little Dragon in Training (DIT) bursts into alertness with crying. I may have an hour to cook; I may have 15 minutes.

I'm glad I put up some meals in the freezer ahead of time but that cache is now depleted and don't even mention baking. All my years of culinary work in pastry and baking and I'm lucky if I get a pan of rice krispies together for the crew.

Which is actually what led me to think about the recipes that manufactures print on their packaging to help the consumer think of the product as versatile and indispensable. It reminds me of the post-war boom of marketing launched by convenience foods and name brands like Betty Crocker, Duncan Hines and Pillsbury.  Cake mixes, proof-n-bake rolls, dough in a tube. Meet George Jetson.

Some of the recipes found on the packaging are actually pretty good, even the off-brands from the store have some interesting ones. That's not to say that I'm about to give up on baking from scratch. But in my quest for balance in the my universe, I am willing to take short cuts now and then if it means happy kids or a few extra minutes to sit at the table while they talk about their day. They don't need to see my mad baking skills every day to know I'm awesome, right? They'd probably much rather have me give them rice krispy treats while we discuss the finer points of season 2 of the Muppet Show.

For this reason, I'll be adding a new segment to this blog that includes manufacturer's recipes; look for posts labeled "On the Back of the Box" for this group. And don't expect the big name brands either--they have their own websites (and payrolls of which I am not on).  I'm taking on some of the lesser known products out there.

And today's might be the easiest of them all...mini pies.

You need two ingredients: pre-made pie crust and a can of pie filling.


(1) Preheat your oven to 350 and pull out a couple of baking sheets. Either line the sheets or spray them with pan spray.

(2) Roll out the pie shell slightly--I made the mistake of trying to get more out of the dough than I should have and then my dough was too thin and split a little. Just sprinkle a little flour over the counter and on top of the dough and roll the dough enough to get any creases out.


 (3) Using a circle cutter (or the top of a drinking glass), cut out as many rounds as you can. Save the scraps from each of the shells and roll them out for remaining circles. You should end up with a total of 20-24.

(4) Place the dough rounds on your baking sheets.
 (5) Place a tablespoon of filling on dough-too much and it will come out of the sides when it bakes so be careful. Fold over and press with a fork to seal.

(6) Bake for 15-20 minutes until golden. You may want to rotate the sheets in the oven for more even baking.

(7) If you like, brush the mini-pies with some confectioner sugar/water glaze when they come out of the oven and are still hot. You'll get that shiny glaze on them as they cool that way.


Okay, not exactly rocket science, right? But for 20 minutes of work you have a cute little treat that you can pack in lunches, use for breakfast or an after-school treat. You could also serve them two at a time with a scoop of ice cream on top for a twist on a la mode. Have fun with the little guys-that's what they are for.


Friday, July 29, 2011

Buttermilk Brownies: Grab a Fork

Buttermilk is a workhorse I often employ in this house-it's cheaper than sour cream or yogurt and more versatile in baking, with just as many savory applications as sweet...and fantastic for soaking your chicken or fish in before frying if you aren't making biscuits, scones, muffins, pancakes or soda bread. And now I can add brownies to the list.

These are not your traditional brownies, dark dense and chewy. Actually, they remind me of a Texas sheet cake-complete with the frosting you apply while the pan is still hot, creating a crusty glaze. The base is moist, with a fine crumb. And  while they cut clean and easy, you might be tempted to use a plate and fork to eat them....or a spoon and a scoop of ice cream. You get a lot of brownie for the work-you'll need a 15x10 pan instead of the traditional 9x11 pyrex or casserole dish.

So, grab your big pan and give it a spray then preheat your oven to 400 (see, not even your usual baking temperature).

In your mixer bowl, combine these ingredients:

2 cups of sugar
2 cups AP flour
1/2 tsp salt
1 tsp baking soda


Measure out
1 cup of buttermilk
2 eggs
1 Tbs vanilla

Now for the fun part; in a saucepan, melt together
1/2 cup (1 stick) butter
1 cup water
1/4 cup cocoa
1/2 cup oil

Stir while you bring this all to a boil. Remove from the heat and pour over the flour/sugar mixture in your mixer bowl. Blend them together and scrape down the bowl with a spatula before adding in the buttermilk and then the eggs and vanilla.
the batter is thin and
shiny


Pour this lovely, shiny batter into the prepared pan and set your timer for 15 minutes. There is a good chance you will need to bake them longer-closer to 20 minutes but in the last few minutes, you'll be mixing up the frosting that gets added to the brownies hot.


So, wash out your mixing bowl and blend together the following:

1/2 cup (1 stick) butter
1/4 cup cocoa
1/3 cup buttermilk
1 tsp vanilla
1# or 4 cups of powdered sugar
1 cup chopped pecans

Beat them together-it will lighten in color a little as it comes together.


As soon as your brownies are done (test it like a cake-use a toothpick for no wet batter or press lightly on the center to see if it springs back), pull them out and spread the frosting over the pan. Weird, huh?  But oh so yummy.


 As the pan cools, the frosting forms that delicious crustiness. These aren't overly rich or chocolately-just the right amount for an after school snack or to dress up with ice cream with some sauce for after dinner dessert.  And since the pan is large, it's great for potlucks, company or the now-possible Sunday football game crew.
 I should have side view of the finished product but I've been busy eating them or laughing at Mr. Devlin's guilty look as he goes back for seconds.

Friday, July 08, 2011

Easy-Peasy Chocolate Buttercream

I hope you weren't waiting for this, like with the cake all baked and hoping I'd get on with it and post the recipe. Because I don't think I can handle any more pressure right now--especially on my body! Oh dear! This child is weighing on me something fierce.....

But I did say I had an easy chocolate buttercream recipe for you and a promise is a promise. This recipe is actually one I got from Martha Stewart (not, like, directly or anything--people like her don't know people like me....for example, I don't have to be plugged into a wall at the end of the day).

This recipe makes about 3 1/2 cups of frosting (nearly enough for a regular round layer cake but not exactly enough, in my opinion, for decorating with a piping bag). The good news is, it doubles and triples easily and whatever you don't need now, you can freeze for later.


Also, you don't need to do any sifting. I would, however, let my butter soften to almost room temperature before starting. If you forget to pull your butter ahead of time, warm it slowly in the microwave 10 seconds at a time until it yields to being pressed gently. You want the butter to be able to hold it's shape because you want to dice it up into cubes.


In your mixer bowl, combine:

3 1/2 cups of confectioners sugar
1 cup of cocoa powder


Just mix until they are a little more evenly distributed before adding in 1 1/2 sticks (that's a cup and a half) of butter, diced. Don't turn the mixer up on speed or anything. In fact, I wrap a dishtowel around the top of the bowl to keep anything from flying out and getting everywhere.

You won't really be able to tell that anything is happening just yet and you'll wonder if you did it right. You did.
 Add 2 tsp of vanilla (or almond if you're feeling daring) to
1/2 cup of milk

and add this to your mixing bowl.


Within a few moments, the frosting will moisten and change color. First, it will be a dark, lumpy mess but within a minute or two, the lumps will disappear and the color will lighten. So will the consistency of the buttercream. The longer you beat it, the lighter and looser it will becomes so don't be over-zealous, Love.


Use a large rubber spatula to scrape the bottom of the bowl to be sure you mixed everything properly. This frosting spreads easily and nicely. If you find your kitchen is a bit hot to work in, give the bowl a chill for 5 minutes or so and stir again before using. The butter will harden fast so don't forget about it for long.


Ok, so finally, I got you the recipe. Hopefully I won't be so long with another post but that's kind of up to my stamina so bear with me....7-9 weeks to go.....

Wednesday, June 29, 2011

Betty Picks a New Devil to Dance With: A New Chocolate Cake Recipe


  Naturally, I have about 500 chocolate cake recipes to work with. It's become nearly un-American to publish a cookbook and not include some form of chocolate cake in it somewhere. Having them doesn't necessarily mean anything though.  There is such a thing as too many options. And, honestly, I  bake based on what I have laying around and what gives the best product for the least amount of mental stress, not based on the pictures of what some celebrity chef supposedly makes.


The biggest trouble with making cakes from scratch is that there is an expectation that they are always going to be lighter and prettier than a box mix and that's just not always the case. Some recipes were developed before certain technology-like a solid Kitchen Aid mixer. Some recipes were published before pioneers like Julia Child came along and demanded that recipes be tested before publication. Yes, you read that right--many books published before 1960 are full of heresay recipes that were never tested by the publisher or even the author....see, you weren't crazy.

Regardless, all scratch cakes are not created equal. And the one I'm about to give you is the best chocolate cake recipe for a basic layer cake that I've come across so far (and that is really saying something).  Moist, fine-crumb, tender and un-fussy to make. 

So here is what you need and what you need to do....


Preheat the oven to 350 and spray 3- 9 inch cake rounds (or, if you are like me and like to cut your own layers, 1 9x4 inch round cake pan (like a Wilton professional pan). When I'm baking a cake in a single layer like this, I also like to line the bottom of the pan with a piece of parchment to ensure it doesn't stick. Now, I'd also like to add that if you like to butter and flour your cake pans (and that's cool) consider using cocoa powder instead of regular flour for the dusting. It's a detail thing.

You will need 3 bowl.

 In the first bowl combine--

2 cups of boiling water to 1 cup of cocoa powder and whisk together to eliminate lumps. Set the bowl aside.

In the second bowl, blend together your dry ingredients:

2 3/4 cups AP flour
2 tsp baking soda
1/2 tsp baking powder
1/2 tsp salt

In the 3rd bowl, your mixing bowl, cream together 

1 cup of butter, softened 
2 1/2 cups sugar


When this light and well-blended add

4 eggs, one at a time to allow them to fully incorporate and 

1/2 tsp vanilla extract

Now, scrape down the bowl with a spatula to get all the butter that may have stuck to the bottom of the bowl before adding half of the dry ingredients. Don't try to blend  it all in totally, just get it somewhat absorbed before adding the rest of the dry. 

Now, remove the bowl from the mixer and scrape down the bowl again to make sure the top and the bottom are well-blended before you add in the water/cocoa blend, that should have cooled off some by now. It's better to do this with your spatula than with the mixer so you don't splash it everywhere. You should end up with a smooth, runny batter that has no lumps. 

Pour and equal amount into each pan or-if you are making cupcakes-ladle into cupcake papers. Depending on what shape you choose, bake until the cake springs back when pressed lightly and pulls away slightly from the edges of the pan. Don't overbake-what does that look like? The top begins to crack wide open and the sides of the cake pull from the sides of the pan dramatically. You'll also see a distinct burnt edge around the top. 

Remove from the oven to cool in the pan for 10 minutes before removing from the pan to cool completely. 

Now, I'll tell you that I like this with a basic chocolate butter cream, the recipe for which I'll give you in the next post if you want it--it's surprisingly easy considering that it's a Martha Stewart recipe (yeah, I know-nothing that woman does is easy, right?).  The original recipe for this cake shows the cake filled with a vanilla butter cream and iced with a chocolate one--which is pretty for presentation when you cut it. You could also try filling the cake with a fruit filling and icing it with the buttercream of your choice. This cake is pretty tender though so you probably are not going to want to use a ganache or heavy fudge frosting, which could cause it to tear apart. 

you don't need 3 pounds of butter to
bake from scratch....but you might need
this much for the buttercream
This cake, believe it or not, took a week for us to eat. We must have been busy or something-I don't know. What I do know is that I kept it in a simple cake keeper and the cake stayed moist the entire time. The first piece and the last one were equally moist and tasty.